Deploying a container image to AWS ECR using a GitHub Action

Yusuf Adeyemo is a DevOps Engineer from Nigeria. He loves helping startups deliver better software and provide more control over their environment and software development process with the help of modern tools and automation.
In this blog post, I am going to show how you can automatically deploy a new container image to AWS ECR using a GitHub Action when there has been a merge to the main branch on GitHub.
Prerequisite:
Basic GitHub Action Knowledge
AWS CLI
Step 1: Create ECR Repository
You must use an IAM user account with Programmatic access rights to create or manage resources on AWS with AWS CLI.
To do that, you need to retrieve your access key ID and secret access key and then set the AWS_ACCESS_KEY_ID and AWS_SECRET_ACCESS_KEY environment variables as shown below.
export AWS_ACCESS_KEY_ID=<YOUR_ACCESS_KEY_ID>

export AWS_SECRET_ACCESS_KEY=<YOUR_SECRET_ACCESS_KEY>
To create a repository in the ECR from the AWS CLI On a machine that has the AWS CLI configured, enter the following to create the repository:
aws ecr create-repository --repository-name name-of- repository --region name-of-region
For example:
aws ecr create-repository --region eu-west-1 --repository-name node-repo
If everything goes well, you should see an output like this:
{
    "repository": {
        "repositoryArn": "arn:aws:ecr:eu-west-1:XXXXXXXXXX:repository/test",
        "registryId": "790783553687",
        "repositoryName": "test",
        "repositoryUri": "XXXXXXXXXX.dkr.ecr.eu-west-1.amazonaws.com/test",
        "createdAt": "2022-09-28T14:01:20+01:00",
        "imageTagMutability": "MUTABLE",
        "imageScanningConfiguration": {
            "scanOnPush": false
        },
        "encryptionConfiguration": {
            "encryptionType": "AES256"
        }
    }
}
Note down the repositoryName in the output; we'll need it later in the process.
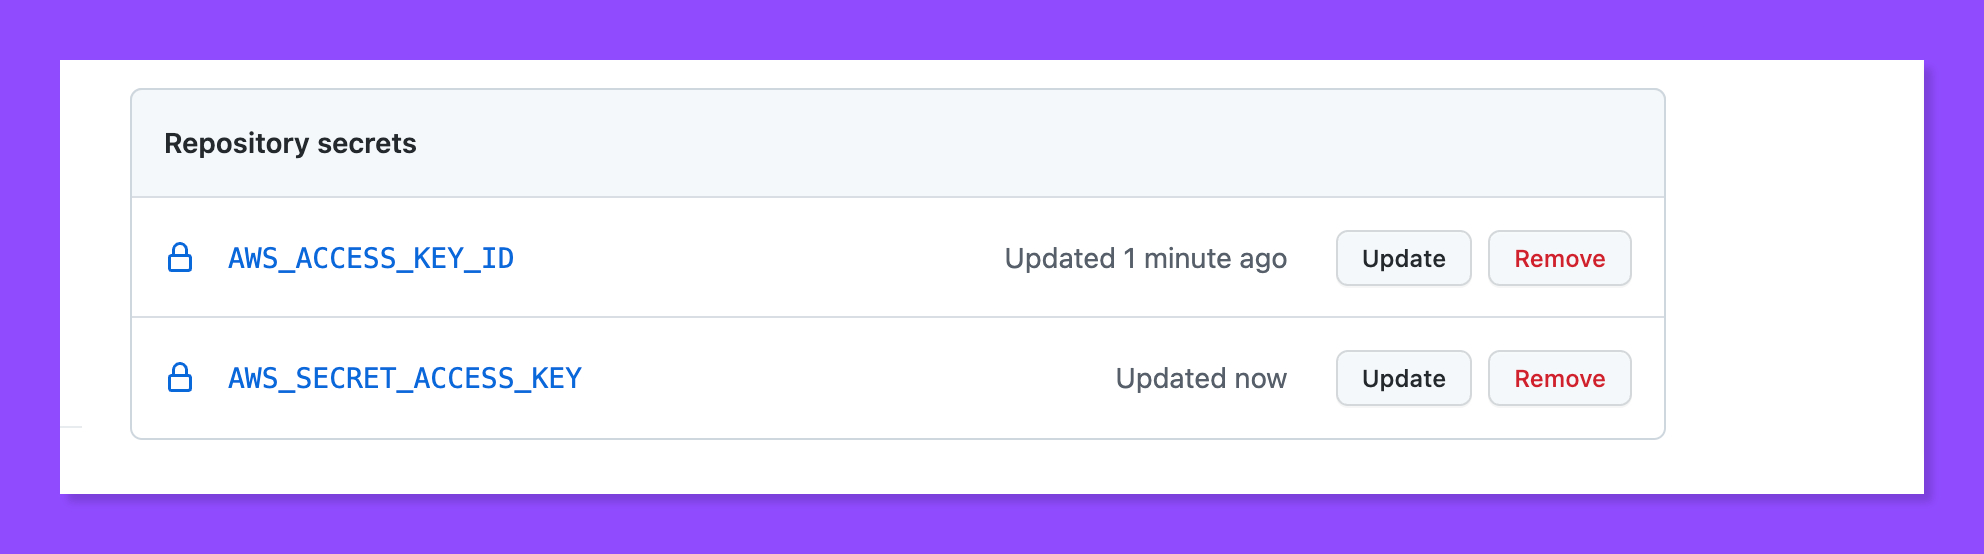
Step 2: Add AWS Credential as Secret.
Under your repository name, click Settings.
In the left sidebar, click Secrets.
Click New repository secret.
Create two new Secrets AWS_ACCESS_KEY_ID and AWS_SECRET_ACCESS_KEY, with the same credential you exported as the env variable above
Step 3: Create your GitHub Action First Workflow
Go to the Actions tab of a GitHub repository and click the Set up this workflow button to create a workflow.
A new workflow file called main.yml will be automatically generated under the .github/workflows directory. Replace the populated content with below.
   name: "Build and push to ECR"
on:
  push:
    branches:
    - master
  pull_request:
jobs:
  BuildAndPushImageToECR:
    name: "Build and Push to ECR"
    runs-on: ubuntu-latest


    steps:
      - name: Checkout Repository
        uses: actions/checkout@v2

      - name: Configure AWS Credentials
        uses: aws-actions/configure-aws-credentials@v1
        with:
          aws-access-key-id: ${{ secrets.AWS_ACCESS_KEY_ID }}
          aws-secret-access-key: ${{ secrets.AWS_SECRET_ACCESS_KEY }}
          aws-region: eu-west-1 // region you want to push the image to

      - name: Login to Amazon ECR
        id: login-ecr
        uses: aws-actions/amazon-ecr-login@v1

      - name: Build, tag, and push image to Amazon ECR 🏷
        id: build-image
        env:
          ECR_REGISTRY: ${{ steps.login-ecr.outputs.registry }}
          ECR_REPOSITORY: "your-ecr-repo-name"
          IMAGE_TAG: v1
        run: |
          docker build -t $ECR_REGISTRY/$ECR_REPOSITORY:$IMAGE_TAG .
          docker push $ECR_REGISTRY/$ECR_REPOSITORY:$IMAGE_TAG
          echo "::set-output name=image::$ECR_REGISTRY/$ECR_REPOSITORY:$IMAGE_TAG"
Replace the ECR_REPOSITORY with the name of the repository you created earlier.
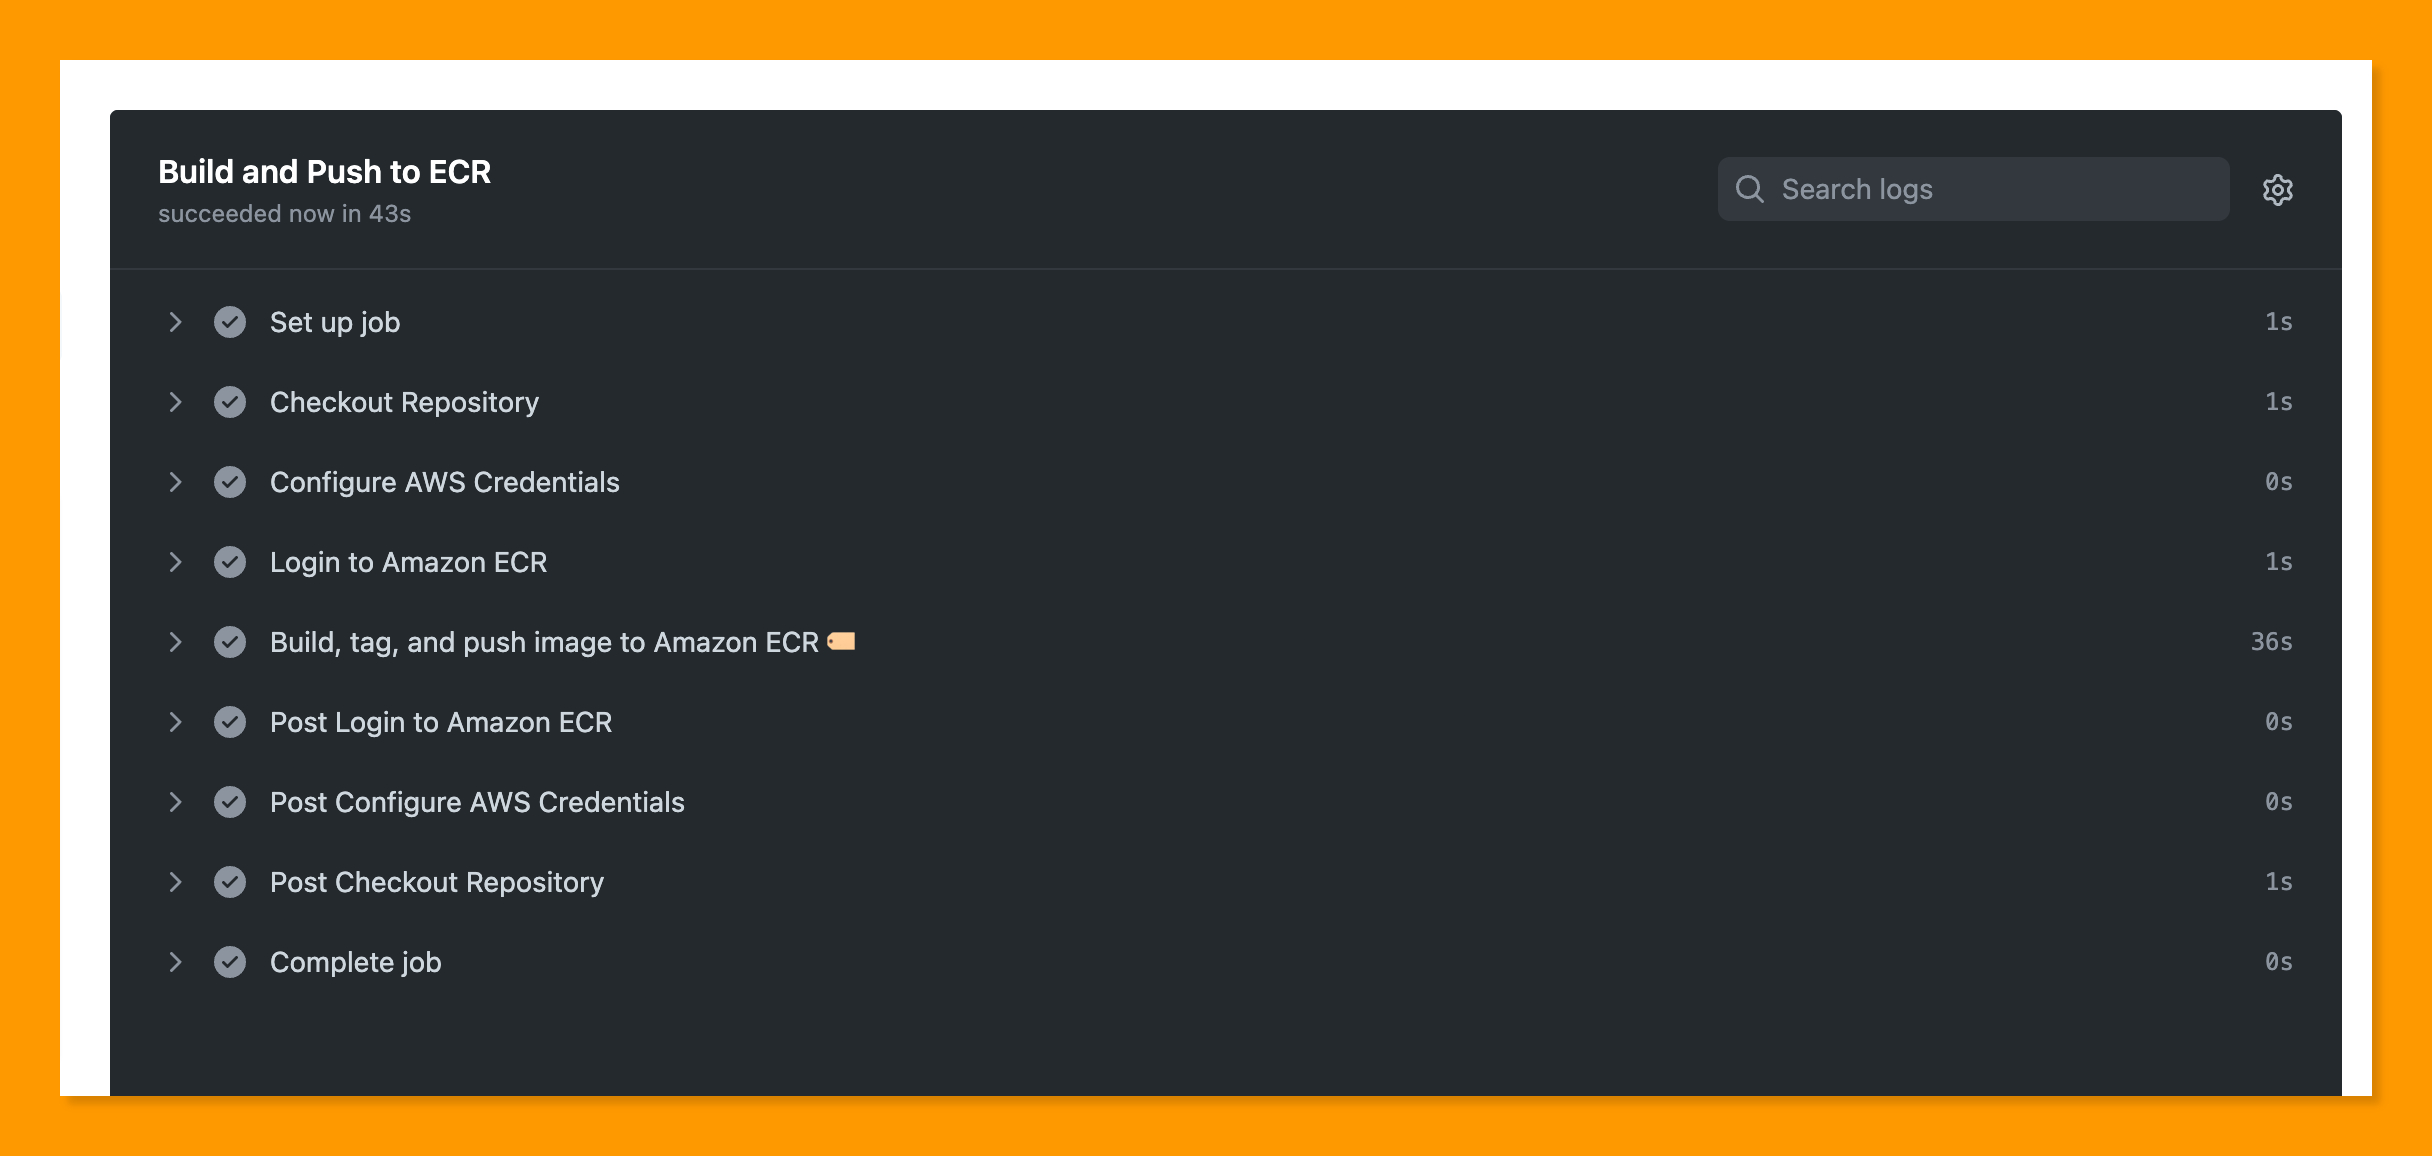
Congratulations! We have successfully created a GitHub that builds and pushes container images to AWS ECR on every pull request to the main branch.
Until next time, 🖤