
From SD to Silicon: Making your NanoPi Production-Ready
Yusuf Adeyemo is a DevOps Engineer from Nigeria. He loves helping startups deliver better software and provide more control over their environment and software development process with the help of modern tools and automation.
We’ve all been there. You spend hours perfectly tuning your OpenWrt configuration, setting up your captive portals, and hardening your firewall. Then, six months later, the system hangs. Why? Because the $5 microSD card you bought decided it had written its last byte of logs.
In the world of DevOps, we don't like single points of failure. If you're running a NanoPi (like the R5S or R6S), you have a secret weapon: Internal eMMC storage. It’s faster, more resilient, and physically soldered to the board.
Here is the "battle-tested" guide to migrating your OS from the card to the chip.
1. The "Identify Your Target" Phase
Before you start throwing data around, you need to know who is who. In Linux, your storage devices aren't labeled "SD Card" or "Internal Drive"—they are blocks.
Most people reach for lsblk, but many lean OpenWrt builds don't include it. Instead, we go straight to the source:
cat /proc/partitions
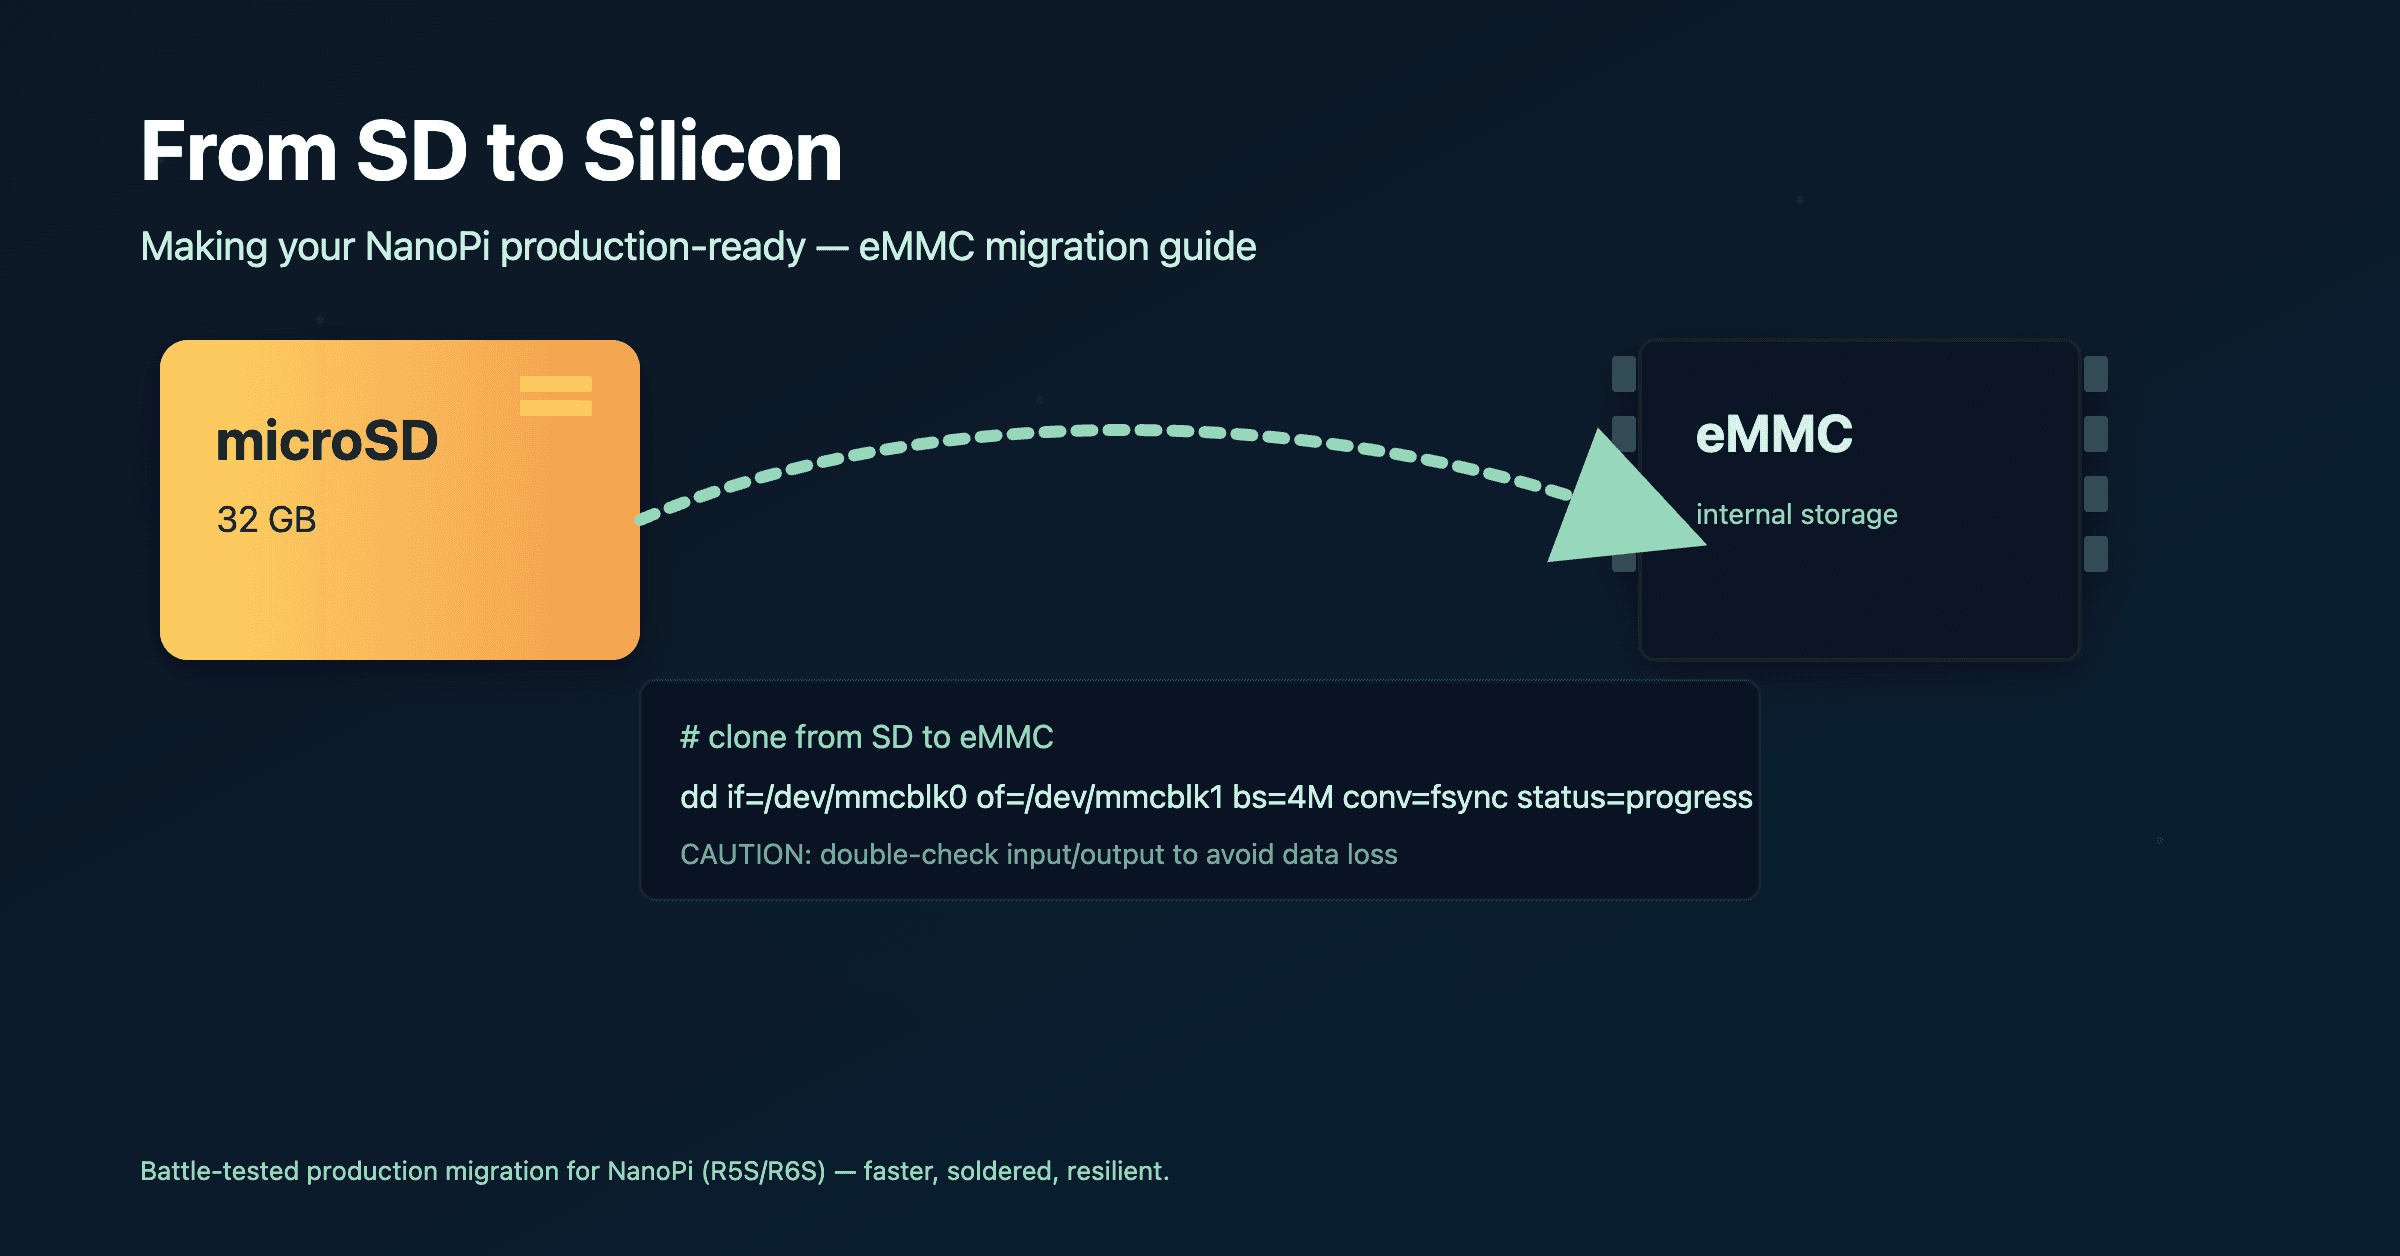
The Discovery: You’ll see two main contenders. Usually, mmcblk0 is your boot source (the SD card) and mmcblk1 is the factory-fresh internal eMMC. Look at the sizes. If your SD card is 32GB and the eMMC is 30GB, you’ve found your targets.
2. The Great Migration (The "DD" Command)
We use the oldest tool in the shed: dd. It stands for "Data Duplicator," but many call it "Disk Destroyer" because if you swap the if (input) and of (output), you’ll wipe your work.
Run the clone:
dd if=/dev/mmcblk0 of=/dev/mmcblk1 bs=1M && sync
A Note on the "Silent Treatment": Don't panic if the cursor just blinks for 15 minutes. Most embedded versions of dd don't show a progress bar. It’s moving 30GB of data. Grab a coffee. If you’re anxious, open a second SSH window and run pgrep -l dd to make sure the heart is still beating.
3. The "No Space Left" Error (The Good Kind)
At the end, you might see: dd: error writing '/dev/mmcblk1': No space left on device.
In any other context, this is a failure. Here? It’s a victory. It means the eMMC was slightly smaller than the SD card, and dd filled every single available block. Since the actual OpenWrt partitions are at the very beginning of the drive, the OS is safe and sound on the new chip.
4. The Moment of Truth
The "Cut-over" is simple but nerve-wracking:
Run
poweroff.Pull the microSD card out. This is the most important step—if the card is in, the NanoPi will always prefer it over the internal storage.
Power it back on.
If that SSH prompt returns without the SD card in the slot, you’re officially running on the metal.
Pro-Tip for the Reader: After booting from eMMC, your "Free Space" might look smaller than expected because you cloned a fixed-size image. Your next task is to use parted or the LuCI web interface to expand the partition to fill the rest of your eMMC.
Happy Routing.